Sunday, May 28, 2006

COVERED!

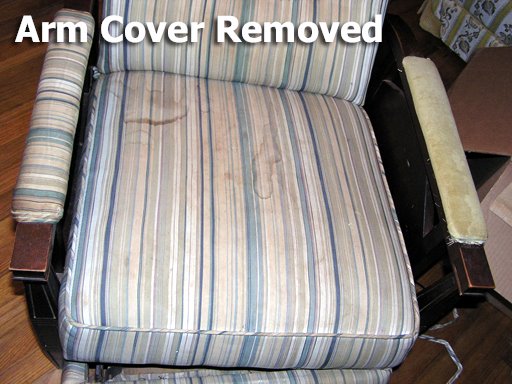
Got the chair covered! Still working on the arms, and the tufting still has to be done on the back (have to glue the buttons to the blanks because they pop off really easily). Decided not to use the top and side pieces and just cut the backrest piece larger so I could wrap it all the way around the chair. Did have to use a small triangle of fabric along the area where the seat cushion meets the back (you can kinda see it in the photo), but you won't be able to see it because of the wooden frame.


Also, cleaned the wooden frame and oiled it down with Old English almond oil - smells SO good! I'm afraid I'm going to have a tough time getting the tufting to be tight enough, but we'll see, hopefully once ALL of the buttons are in place it will be more pronounced. Photo shows two top buttons in place, but it is barely noticable.
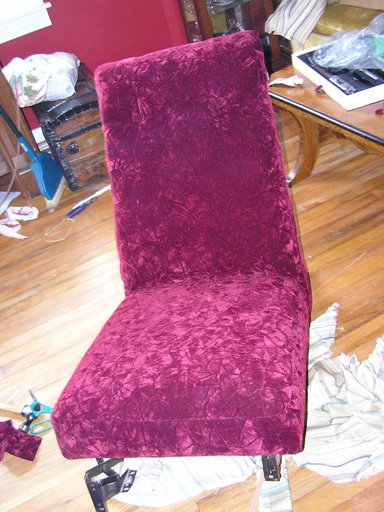
Saturday, May 27, 2006

The FUN stuff


Now for the fun stuff - picking out fabric, making buttons, etc.

Step 8.
Drew a diagram showing how all of the pattern pieces will fit onto 54 inch fabric. Determined that it would take 2.8 yards per chair (only because I'm choosing a pattern that I can use vertically or horizonatally - would not have worked with say a striped fabric). Got my fabric (7 yards) on Wednesday - 9.99 yd at Hancock for a gorgeous burgundy crushed velvet. Was a little bit worried that my buttons wouldn't work because they were for light/med weight fabrics, but the lady at Hancock said it'd probably work fine and she was right! Bonus: all buttons 1/2 off at Hancock this weekend!


Step 9.
Covered my buttons AND the foot rests, though I'm not entirely sure why I bothered with the bottom foot rest, because this chair will be bolted down so it doesn't recline - so the footrest will never be seen! DUH!

My obsession - THE CHAIR

Monday night I disassembled the WHOLE chair!

Step 4: Unbolted recliner mechanism from wooden cross piece under the chair (4 bolts, 2 screws). Removed foot swag (don't know what to call it) from the wooden base. It's attached to the front of the chair upholstery with a cardboard stablizing strip. There was a small piece of piping stapled to the underside of the chair. NOTE: The's a brace along the bottom of the chair that is broken, looks/feels like a piece of wire that's been wrapped in brown paper tape. Will probably replace this wiht a couple pieces of galvanized fencing wire.


Step 5.
Removed foot pieces (had to put some soap on the bolts to get them to move). Noticed reclining mechanism is missing a spring, but since the whole brace is broken, I won't be allowing this chair to recline at this point, so I think it's a non-issue at this point.


Step 6.
Removed staples from bottom, looks like gray vinyl type material is attached to both the seat and the back in order to pull it through the area between the seat and the back - then stapled on the back inside. Finally got fabric off the back!


Step 7.
Took off all fabric, used seam ripper to detach fabrics. I will have to remember to add the seam allowance to the back piece because it was sewn to the white backing material (that lays between the foam cushion and the springs). I think I'm going to try to redo the backing without sewing. I can probably get away with stapling the front piece to the sides, then stapling the side pieces with a cardboard stabilizing strip.

GOD, what a MESS!!!

Sunday, May 21, 2006

The chair that ate my brain...

Bought a couple of old recliners yesterday for 20 bucks a piece. I'm going to tackle my very first upholstery project - and I'm terrified! (thanks MOM!) So I've posted on a couple message boards and been reading a LOT on how to reupholster furniture - it's overwhelming, but I'm trying to approach it with a mantra - "slow and steady wins the race" - or something like that...

Here's a pic of the chair and the step by step:


Step 1: Removed back - metal flex strip on the sides (gonna have to buy some of that and figure out how to use it!). The fabric along the top was put on with a cardboard strip and batting on top, then it was pulled tight along the bottom and stapled (raw edge). I believe the flex striping was put on last? Not sure about that. There are two screws on either side of the tufted chair back that hold the wooden frame on.


Step 2:
Removed side panel upholstery. I may remove the cardboard and staples and then paint or restain the inner portion - not sure why it was upholstered in the first place...


Step 3: Removed cording and fabric from the arm of the chair - you can see how nasty the upholstery is in this pic! Will probably trim the chair in some sort of braided trim or cord to avoid having to use piping.


Fabric Measurements:
Back - 20x32"
Arm Cover - 3x16" (trim - 37")
Side Panel - 21x3" (trim - 46.5)